Back Home
Photorealistic Raspberry Pi robot car on a workbench with sensors, wheels, wiring, and blue workshop lighting
WolfieWeb Robotics Academy

Build a Raspberry Pi Robot Car

This guide walks you through a practical Raspberry Pi car build: the parts, wiring idea, setup flow, testing steps, and the mistakes to avoid before your robot starts rolling across the floor.

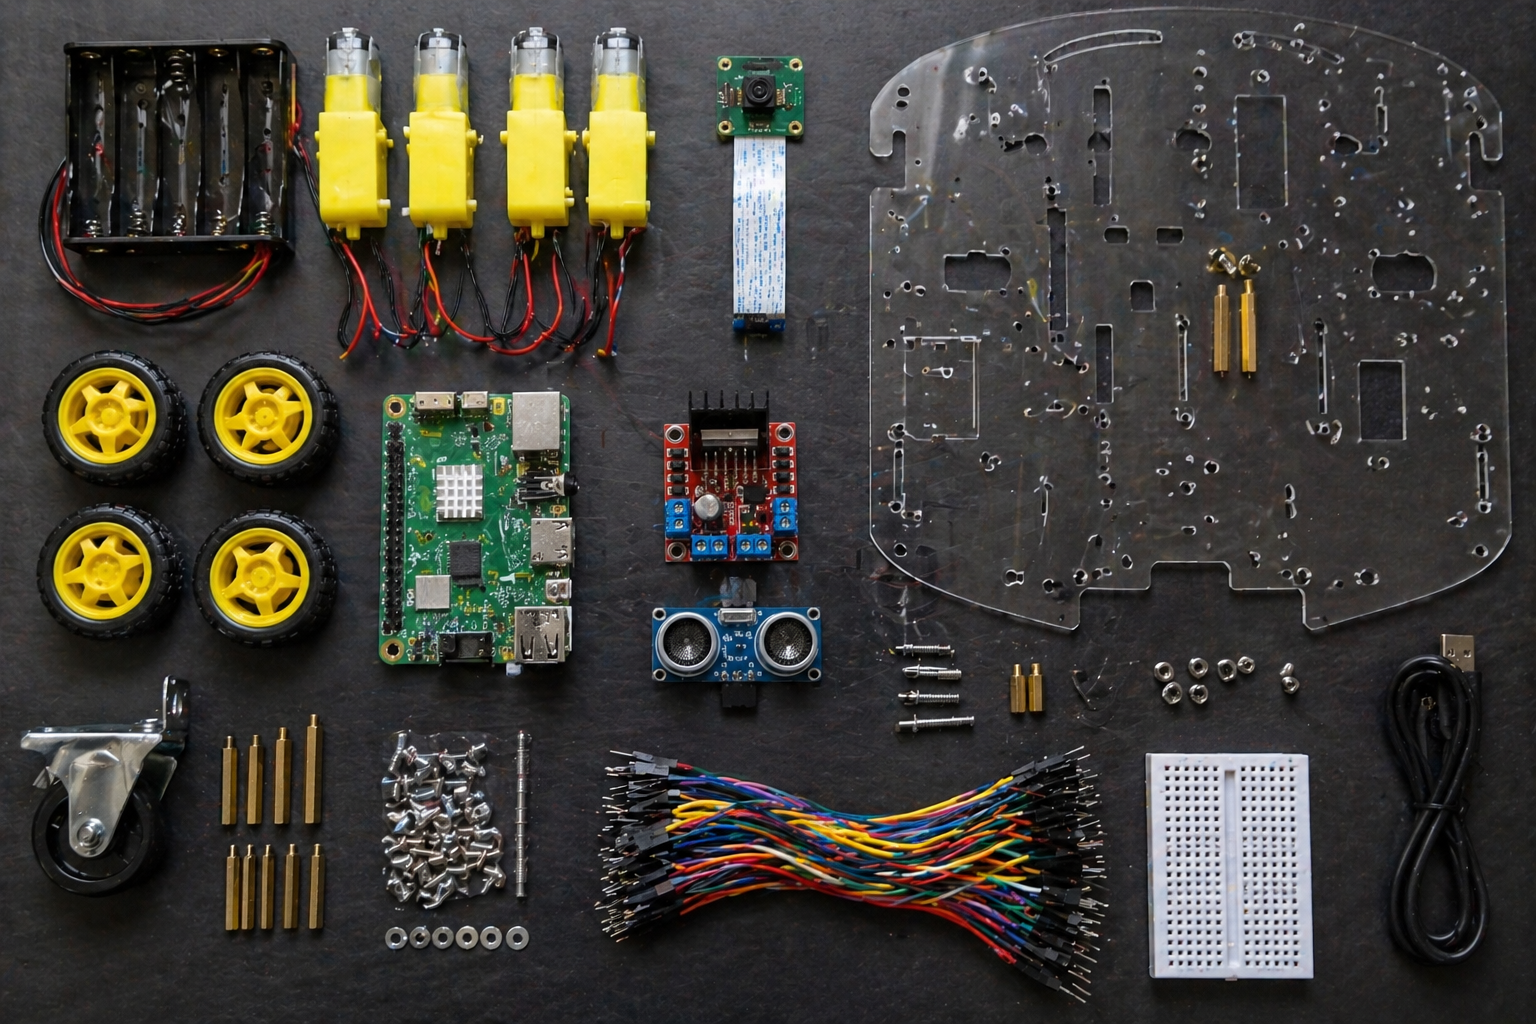
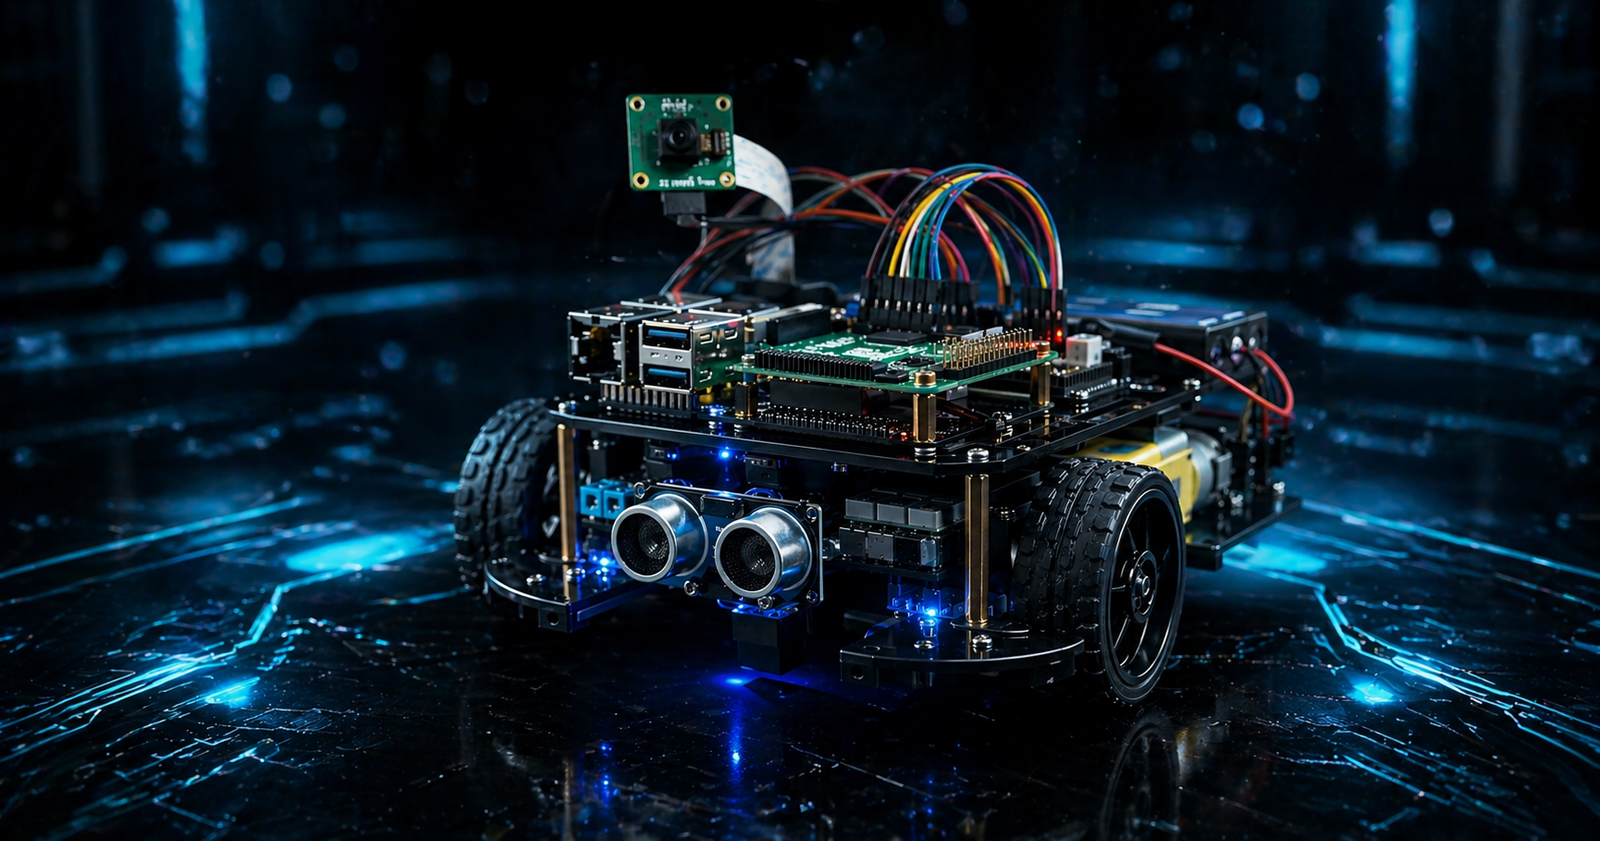
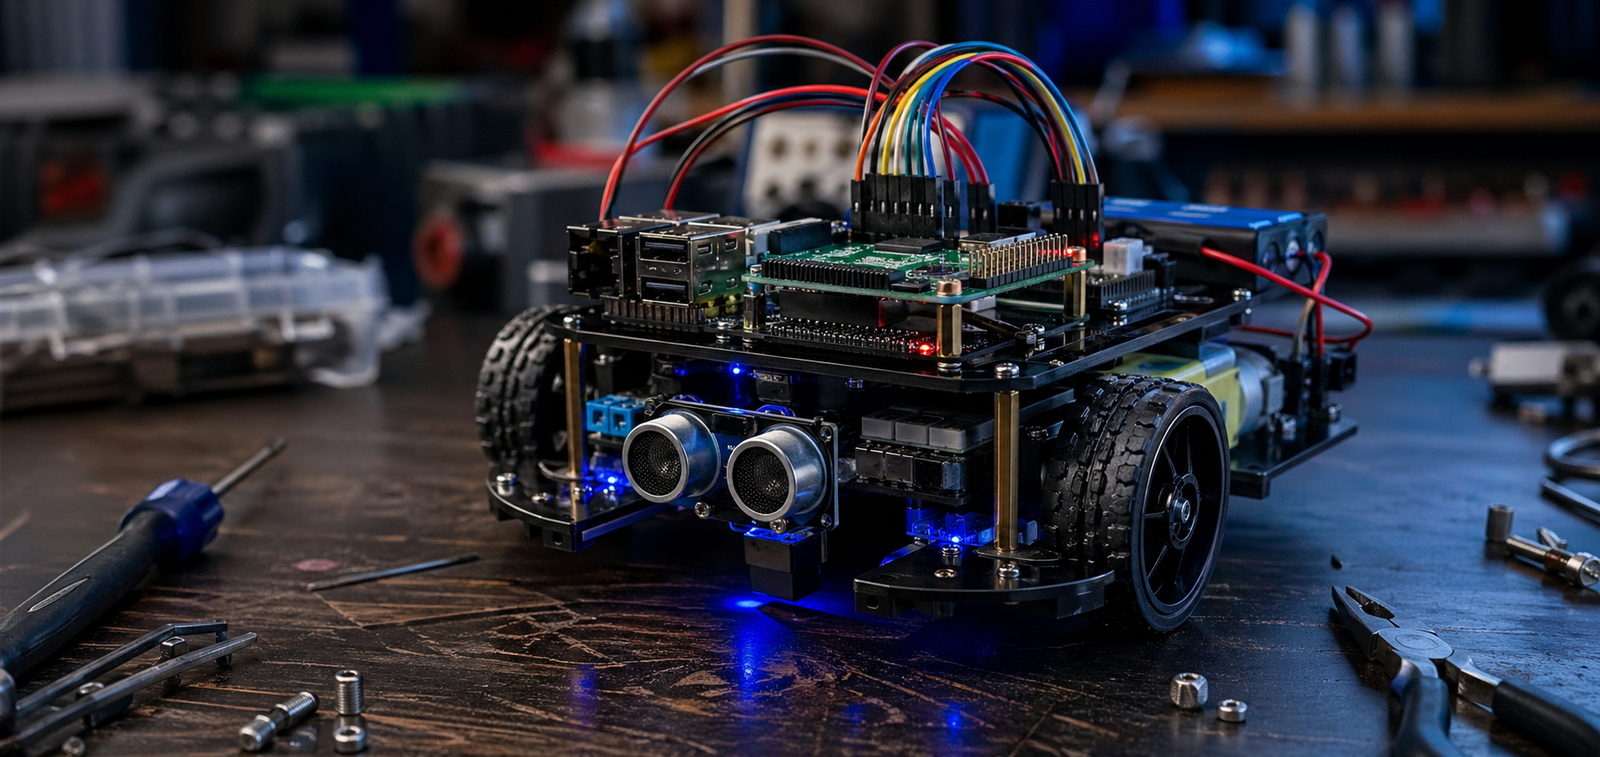
What You Are Building

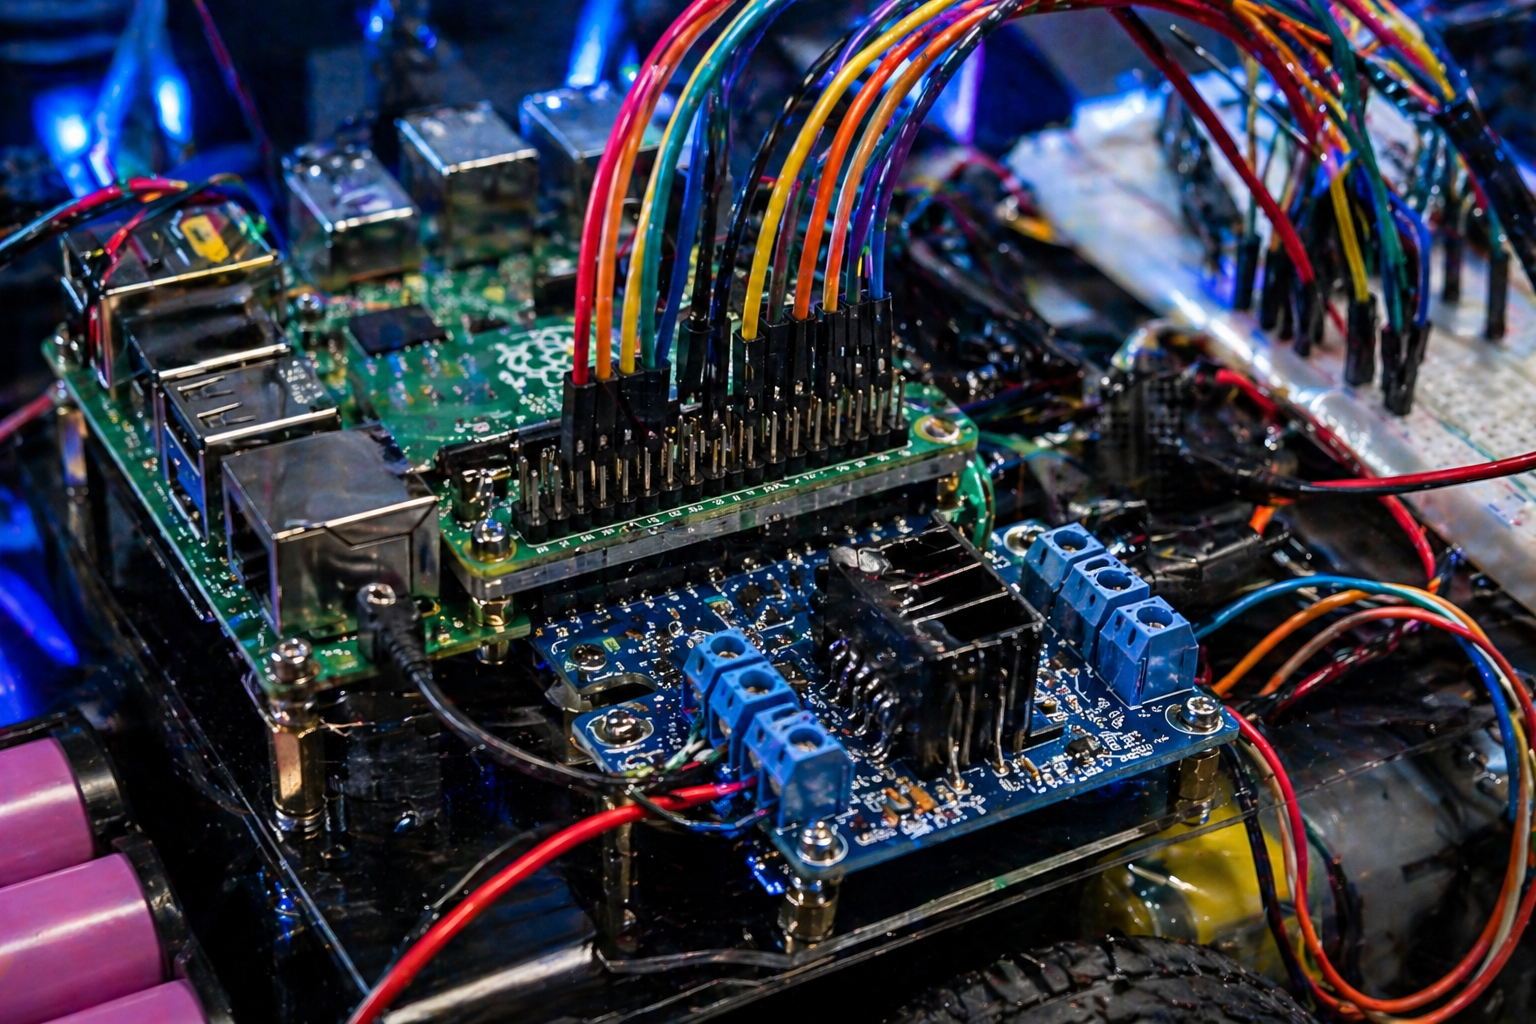
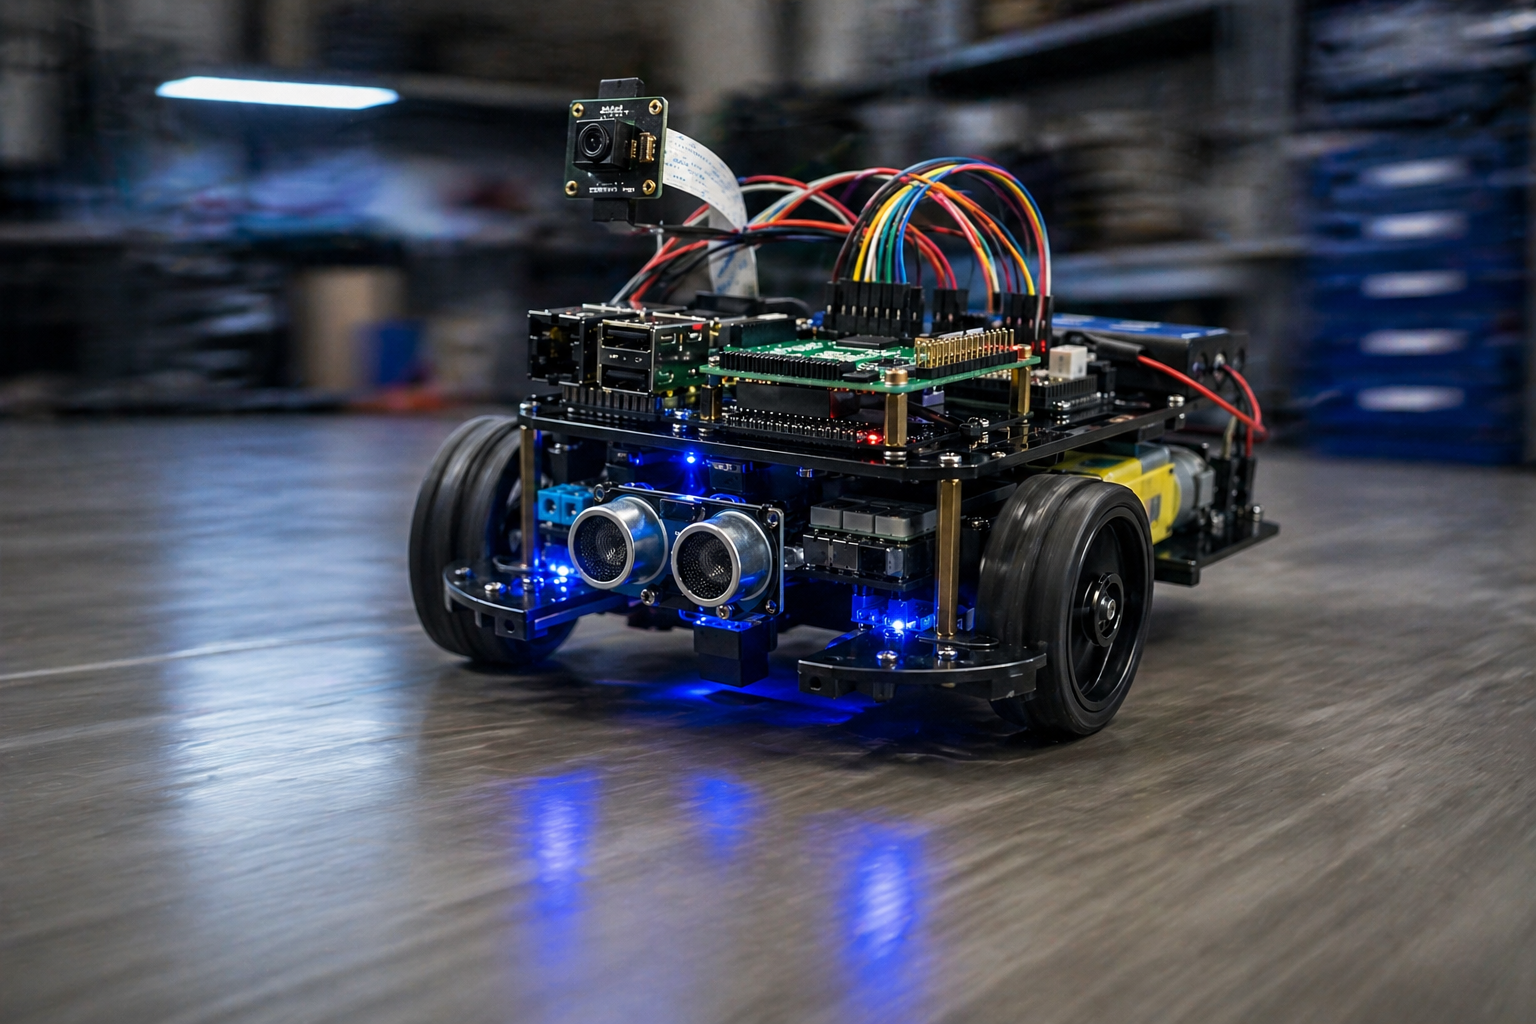
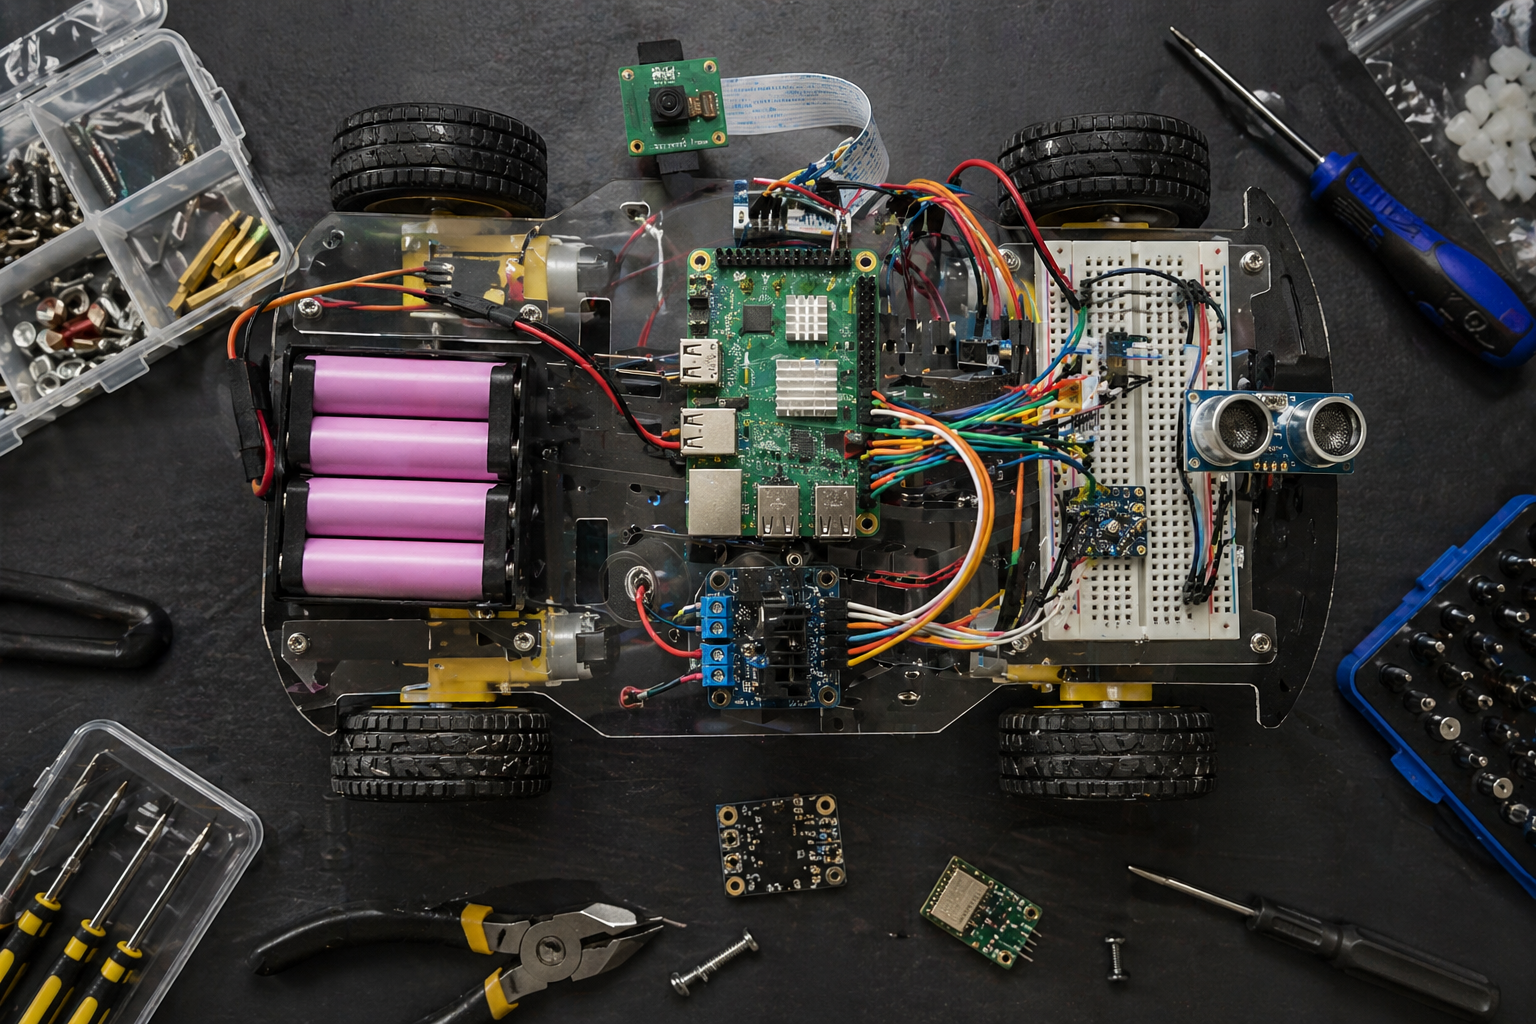
You are building a small smart car powered by a Raspberry Pi, motor driver, DC motors, battery pack, ultrasonic distance sensor, and optional camera module. The point is simple: learn how the Pi controls movement, reads sensors, and reacts to the world around it.

This is a hands-on starter project. It teaches real robotics basics without pretending the first build will be perfect. Expect to test, adjust wires, check polarity, and troubleshoot. That is the actual robotics learning curve. 🤖

Safety note: double-check motor power wiring before turning the car on. A wrong connection can damage the Pi, motor driver, or battery pack.
Flat lay of Raspberry Pi robot car parts including chassis plates, wheels, DC motors, motor driver, ultrasonic sensor, camera module, jumper wires, screws, and battery holder

Core Parts

  • Raspberry Pi board with microSD card and power setup
  • Robot car chassis, wheels, DC motors, screws, and standoffs
  • Motor driver board for controlling left and right motors
  • Ultrasonic sensor for obstacle detection
  • Battery holder or approved mobile power source
  • Jumper wires, breadboard, and optional Raspberry Pi camera module

Wiring Overview

The Raspberry Pi sends low-power control signals from GPIO pins to the motor driver. The motor driver handles the heavier motor current. Keep the logic side and motor power side clear in your head, because mixing them up is how beginner builds get fried.

The ultrasonic sensor mounts at the front like a pair of eyes. It measures distance so the robot can slow down, stop, or turn when something is in the way.

Close-up Raspberry Pi robot car wiring with GPIO pins, colorful jumper wires, motor driver board, battery leads, and breadboard connections

Build Steps

Assemble the chassis

Mount the motors, wheels, caster wheel, standoffs, and Raspberry Pi platform. Keep the board high enough that wires do not drag into the wheels.

Mount the Raspberry Pi and motor driver

Secure the Pi and motor driver before wiring. Loose boards cause mystery failures once the car starts moving.

Connect motor outputs

Wire the left and right motors to the motor driver. Label left and right if needed. It saves time later when one side spins backward.

Connect GPIO control wires

Run GPIO signal wires from the Pi to the motor driver inputs. Use clean wire routing so you can troubleshoot without pulling everything apart.

Add the ultrasonic sensor

Mount it facing forward and wire it carefully. The sensor gives the car basic obstacle awareness.

Test slowly first

Lift the car off the table and test wheel direction before placing it on the floor. That one move prevents a lot of crashes.

Raspberry Pi robot car driving across a smooth floor with glowing LEDs, sensor eyes, camera module, and motion blur on the wheels

Testing Tips

  • Test one motor at a time before running full movement code.
  • Check that forward, reverse, left, and right commands behave correctly.
  • Keep the first test speed low. Fast mistakes break parts.
  • Watch battery voltage. Weak batteries create weird motor behavior.
  • Use short test scripts before adding sensors or camera control.
Top-down Raspberry Pi smart car build with exposed wiring, board, motor controller, breadboard, sensors, camera module, battery pack, tools, and parts tray

Build View

The top-down view makes it easier to understand how the parts fit together. Use this kind of layout when planning your own build: board placement first, then motor driver, then battery, then sensors.

Share Image

This image is included for social previews and article cards. It is already connected in the Open Graph and Twitter/X metadata above.

Raspberry Pi robot car centered on a futuristic dark tech background with glowing cyan circuitry and visible sensor eyes

Share This Build

Send this Raspberry Pi robot car tutorial to another maker, robotics student, or anyone ready to build something real.